
As a small business, you might need to prepare invoices for your clients or employees (or both).
It depends on your business module, type, and mode of operation. However, designing an invoice from scratch for any purpose is a bit challenging.
If you’re thinking you could simply use an online template, that’s true. But it won’t help you set up a reliable system for generating invoices that are specific to your business.
So in this post, we’ll share a simple step-by-step guide to help you create an invoice of your own for your small business. Let’s get started!
Step 1: Create a Template
First, you need a tool to create a template. You can use Freshbooks, Microsoft Excel, Canva, Adobe, Google Docs, or any other tool you prefer. Here’s a list of the best invoicing software for 2022.
If you choose graphic design software, you’ll have to set the structure and outline too. But if you opt for a payment processing tool or this small business invoice template from Westpac, the design and positioning of essential elements of your invoice will be predefined.
For example, you’ll have to choose where the header and invoice number should be placed on Canva. But if you use Paypal’s invoice generator, the platform will automatically generate something like this: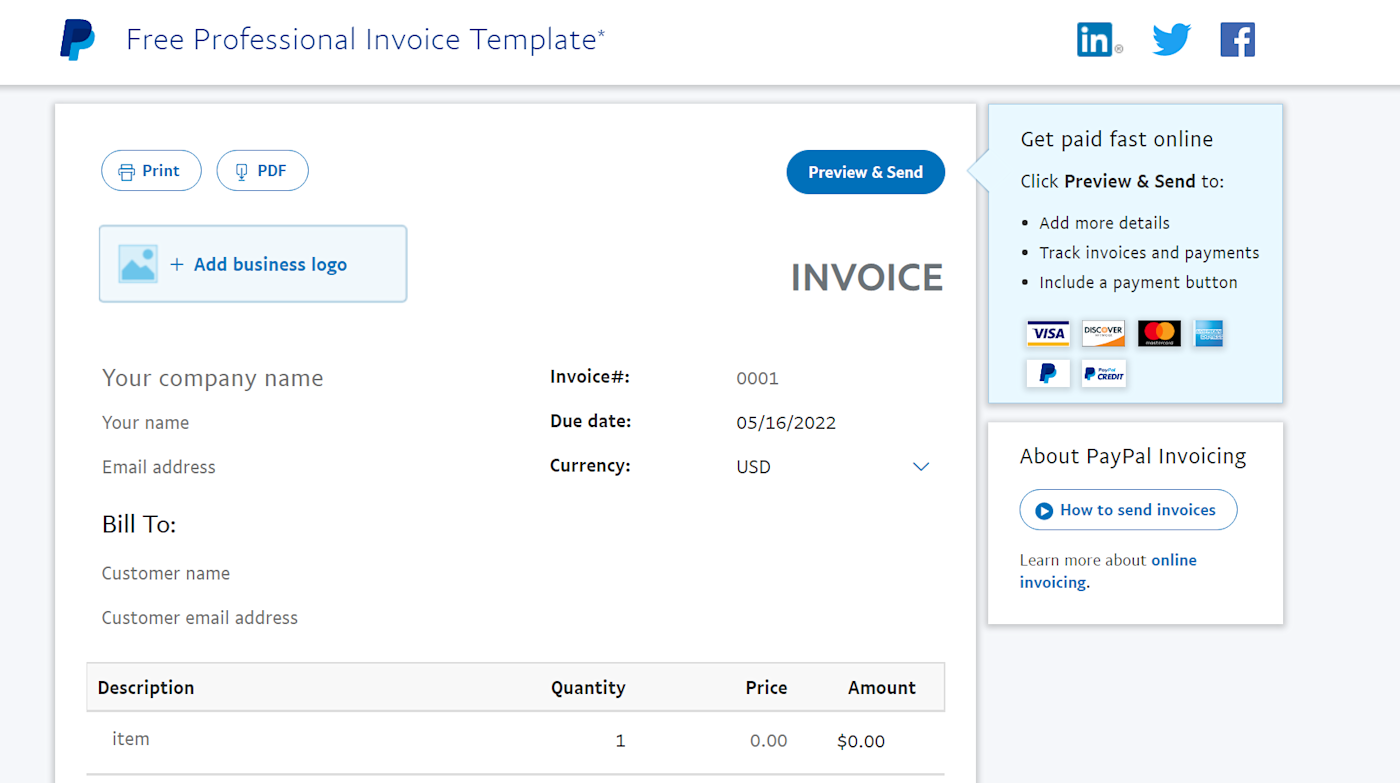
In any case, we ask you to ensure that your template has the following essential elements:
- Header
- Unique identifier or invoice number
- Company information (contact details, address, etc.)
- Date
- Details of goods and services sold
- Additional fees or taxes
- Subtotal & grand total
- Terms of transaction
- Message to the customer/employee
You can exclude the last two elements if need be. But they make the communication between you and your clients smoother.
If you’ve only started out, you can add details about the recipient of the invoice as well, such as their name, banking details, etc.
Step 2: Brand the Template
Once you’ve created the basic template, it’s time to optimise it for your brand. For branding purposes, add the following:
- Your brand logo
- Brand colours
- Brand font
What’s the purpose of adding these? Well, they help generate brand awareness amongst your existing employees, clients, and anyone who goes through your invoices. They also make you appear more professional and dedicated to your brand.
Also, creating an error-free invoice is another aspect of branding your invoice. It depicts your inclination towards accuracy.
Tip: If you’re short on time and require a quick solution, pick a free invoice template and edit it a bit to add your brand assets. It will serve as a perfect and professional temporary solution. In the long run, however, it’s best you craft your own.
Step 3: Add Products & Services
Here comes the main body of your invoice. The section where you add products and services should be positioned centrally, and it should occupy 60-70 percent of the canvas of your invoice.
It’s best to add them in a list or tabular form with their corresponding prices mentioned right in front of each item. We recommend adding at least three columns. For every item included, these columns should mention:
- Name of the product/service
- Quantity of product/service
- Total pricing of the respective product/service
You can add more if you deem it appropriate. Note that the specifics of each invoice will be different (as per each individual). So, ensure you add column or row titles that work for all.
Step 4: Add Important Details
After adding the main contents of your invoice, it’s time to add some important details. These details may include information about taxes, discounts, or any other information affecting financial operations or the invoice.
Usually, you can position this element of the invoice in a smaller font right below the table. Or you can add an additional box on the left or right side of the table/list, where there is extra space.
Step 5: Send & Follow Up
Lastly, save the template in an editable format. We recommend you save it as a PDF file. It preserves the alignment and is easily accessible and convertible.
If you designed the template for the employees you’ve hired, you should share it with them. If necessary, record a Loom video to explain to them how they can use the template to fill in the specifics and use it to bill their services to the company on a monthly basis.
If you’ve to send it to a client, fill in the contents, and send it to them via email. Don’t forget to write a relevant subject line and email text about the invoice.
You can also mail the invoice as per your audience’s preferred mode of communication. Also, don’t forget to follow up on the invoices you’ve sent.
How to automate invoices?
There are three ways to automate invoices:
- Create a template and put it to use.
- Use invoice processing software or tools.
- Generate quick and accurate receipts right from your online store.
We’ve provided a detailed outline of how you can implement the first method above. You can check out how to implement the second and third methods here.